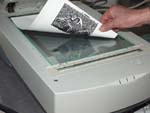
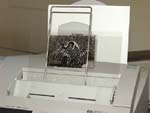
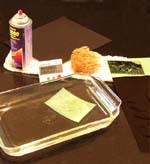
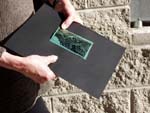
Create Art Screen Stencils
  1. Scan your graphic It needs to be black & white, not greyscale.
  2. Print the image onto transparency or 20# paper using an inkjet or laser printer set on the darkest setting. It’s important to have an opaque image. If light gets through, the design won’t register.
  3. Gather your supplies
  • MakeScreensTM art screen stencil
  • B&W image on paper or transparency
  • Repositionable spray adhesive or contact frame that comes with the Evaluation Kit
  • Timer
  • Sheet of stiff black cardboard (or MakeScreens Evaluation Kit)
  • Container of water, towels & sea sponge
  4. Prepare MakeScreens for exposure
Remove the plastic protective film from the sheet of MakeScreens. Do not remove protective film until ready to expose and then handle the MakeScreens from the edges.

If you do not want to use the entire MakeScreens sheet at one time, cut before peeling. Place remaining unpeeled sheet back in its light-protective envelope for future use.

  5. Adhere the graphic to the shiny emulsion-covered side.
  6. Exposing MakeSceens
  • Sunlight
    Hold MakeScreens perpendicular to the rays of the sun. Keep from bending by supporting it with a stiff, black backing. Time exposure with a kitchen timer with second indicator following guidelines in table below.
 
  • Fluorescent Light Table
    Cover the back of the MakeScreens with a black sheet of paper and expose according to the times given below for the different types of fluorescent tubes. Time exposure following guidelines in table below.
    See Build a Light Table.
     
Exposure Times
Bright Sunlight Transparency 30 seconds
20-lb white paper 4 minutes
Two 15w 18” Daylight fluorescent tubes 1.5"-2" from MakeScreens Transparency 6 minutes
20-lb white paper 24 minutes
Two 20w Cool White  fluorescent tubes 1.5"-2" from MakeScreens Transparency 14 minutes
20-lb white paper 40 minutes
Two 20w Full Spectrum  fluorescent tubes 1.5"-2" from MakeScreens Transparency 4 minutes
20-lb white paper 14 minutes
  7. Developing the Screen
Place the exposed MakeScreens in a container of tap water for at least 10 minutes.
  8. Clearing the Screen
Gently dab the screen with a natural sea sponge or a soft paint brush to clear the design. You can also place the screen on a firm surface and hold it shiny-side-up under cool running water.
  9. Final Step in Making the Screen
Re-expose the now-cleared screen to a light source for a minimum of 10 minutes. Let dry completely with the shiny-side-up. If the shiny side comes into contact with another surface while drying, the emulsion will to stick to it. If this happens, re-soak the stencil until it releases. Once fully developed, MakeScreens are no longer light sensitive.
Classes  •  Order Art Screens  •  Workshop on CD  •  Image Library  •  Supplies  •  Tips

go to top